Certbot
Let’s Encrypt’s certbot replaces Asustor’s default integrated certbot, which supports only HTTP validation method.
Cappysan’s repackaged certbot supports HTTP validation as well as DNS-based challenge validation.
Installing this package is only required if you plan on using your own domain with Let’s Encrypt SSL generation. If using a self-signed certificate, or Asustor’s builtin certificate, or using a commercial certificate, then this step is not needed.
Note
Having proper SSL support isn’t strictly necessary, but having a valid SSL configuration is more enjoyable than having to either add one SSL exception per website in the browser, or having to change every configuration to allow insecure connections.
Warning
All parts of this Asustor Home Lab tutorial is based on the fact that SSL is configured and used.
Installation
Download the certbot APK from https://asustor.cappysan.dev/certbot/
In the AppCentral applet, install the “Python 3” package if not yet installed.
Usage
The following files from /share/Configuration/certbot must be edited:
Edit
domains.confto specify the domain names to be validated. The file contains a comma-separated list of domains, without spaces. Wildcard domains are supported when using DNS-based validation.
Note
Using a wildcard, such as *.example.com, is recommended.
Edit
provider.confand enter the name of the DNS provider (for example, ovh, route53, etc.). This setting determines which DNS plugin configuration is used when constructing the Certbot command line. Accepted values correspond to the DNS provider component of the plugins listed in Certbot’s list of DNS plugins. If you use a custom value that does not correspond to a supported DNS provider, you must create a command-line configuration file.Edit the
credentials.conffile, or the file corresponding to the selected provider (for example,ovh.conffor the OVH plugin), creating it if necessary. Each file contains comments indicating where to find additional documentation for that provider.Optionally, create a
cmdline.conffile to override the DNS-specific Certbot command line. This file is required when using a non-standard provider.Restart the application, either through the Asustor web interface or via SSH using the following command: /share/Configuration/certbot/start-stop.sh restart
Note
Certbot log messages can be found in System Information / Logs.
Warning
Because of a bug in the Asustor software, the NAS must have been rebooted at least once since installation for syslog messages to be logged.
SSL Configuration
Once certbot runs without error and are installed, the SSL certificates must be installed to /usr/builtin/etc/certificate/. The Asustore builtin certificates stay located in /usr/builtin/etc/certificate/ssl_default.
In order to install the certificates:
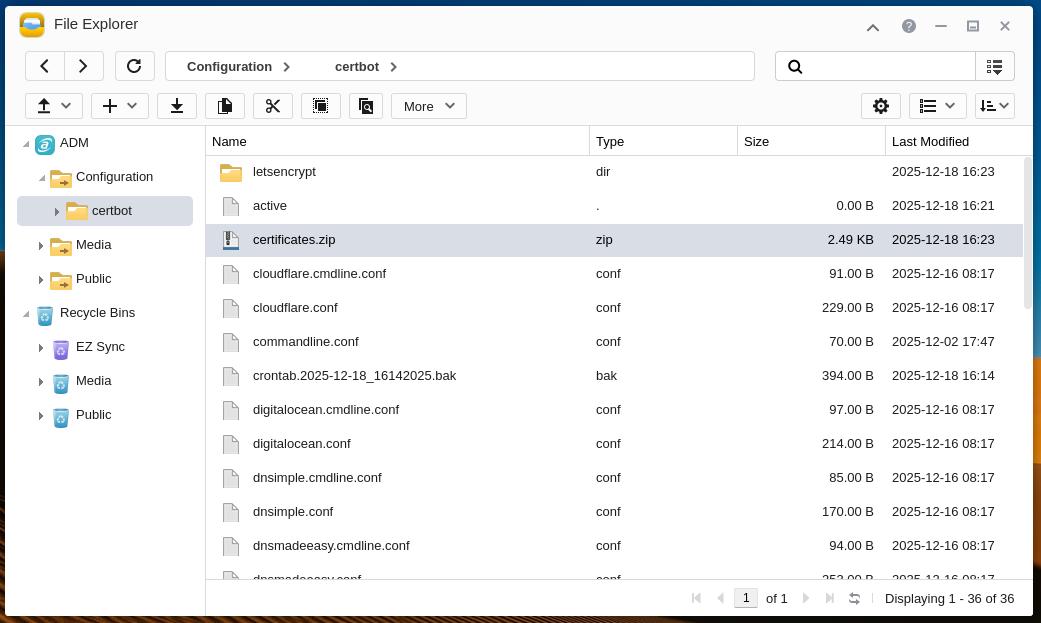
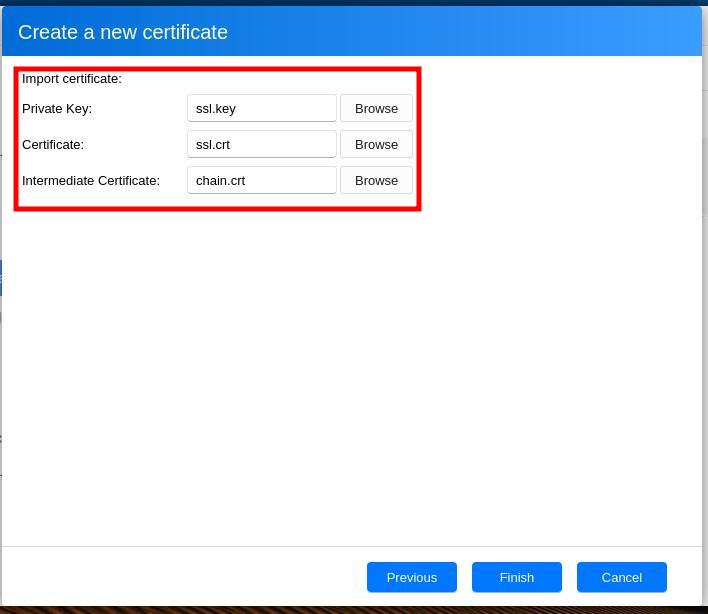
Retrieve the certificates zip file from the certbot folder in the Configuration folder and unzip it.
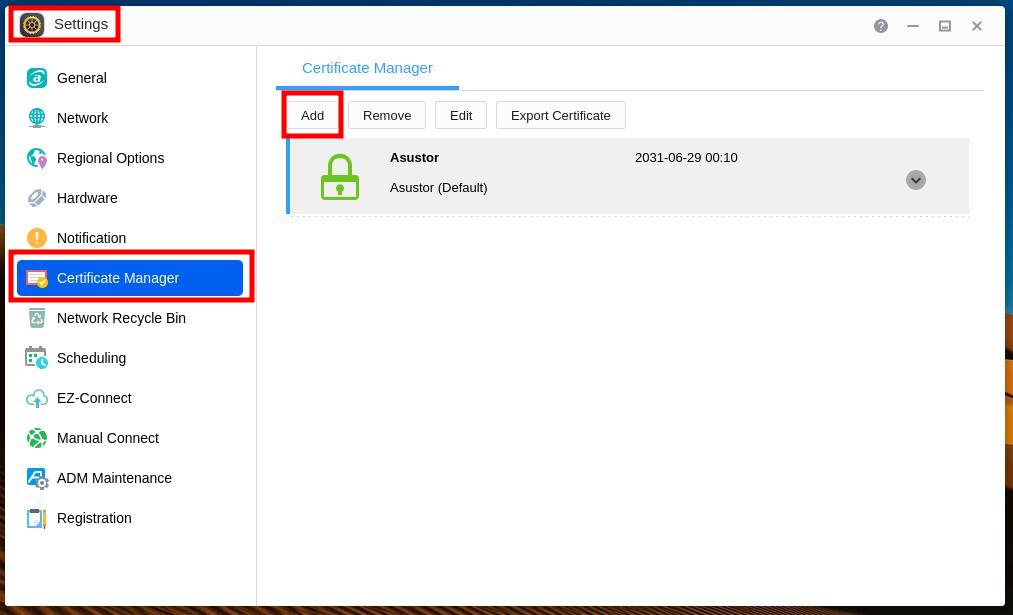
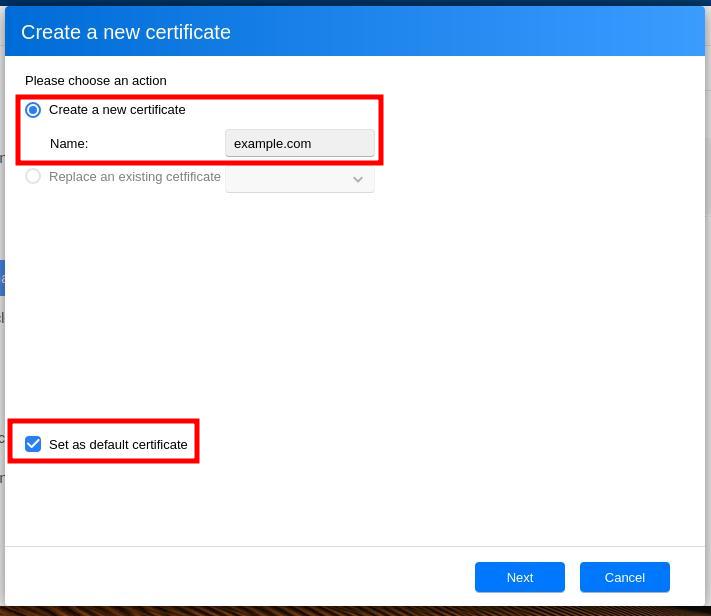
Add the certificates to the certificate manager:

From now on, the certificates will be renewed automatically.